Building Your First Nextflow Pipeline: PART 3 - Modularization & Configurable settings
Nextflow is a workflow management system designed to simplify the process of writing and executing complex computational workflows. The main advantages of nextflow are:
- Reproducibility: ensures workflows can be run consistently across environments.
- Portability: supports execution on laptops, HPC clusters, cloud (AWS, GCP, Azure), and container platforms (Docker, Singularity).
- Scalability: handles anything from small local runs to massive parallel workloads.
- Modularity: pipelines are built from reusable processes that can be easily combined.
- Container support: seamless integration with Docker, Singularity, and Conda for reproducible software environments.
- Dataflow programming model: channels handle complex data parallelism naturally.
- Error handling & resume: automatic checkpointing allows workflows to resume from failure points.
In previous posts of this series, we first built a workflow that only processes one sample, and then updated it to work with multiple samples. In today's post, we will learn how to modularize the code and make the settings configurable.
Modularization
For this part, I will follow the nextflow tutorial Part 3: Moving code into modules.
Basicaally, we will create a modules folder and move each process to a separate file. Then we will import those modules in the main script. This will make our code cleaner and easier to maintain or share among different projects.
The first step is creating a folder names modules in the same directory as the main script, inside we can arrange the modules (processes) as we wish but I recommend creating subfolders by tool as follows. We also create a main.nf file inside each folder to hold the process code.
INDEX process
1mkdir -p modules/simpleaf/index
2touch modules/simpleaf/index/main.nf
we move the code from the main script to the new main.nf file and replace it with an include statement:
1include { SIMPLEAF_INDEX as INDEX } from './modules/simpleaf/index/main.nf'
As you see, we can conveninently even rename processes on the fly to make our life easier.
Now do the same for the QUANT process ( see the bonus section if need help).
And this is it, now the folder structure should look like this:
 1.
 2├──modules
 3│   └── simpleaf
 4│       ├── index
 5│       │   └── main.nf
 6│       └── quant
 7│           └── main.nf
 8├── nextflow.config
 9├── post.1.nf
10├── post.2.nf
11├── post.3.nf
12└── post.4.nf
and we just need to run the pipeline as before (you can check the post.4.nf file in the bonus section):
1nextflow run post.4.nf -resume
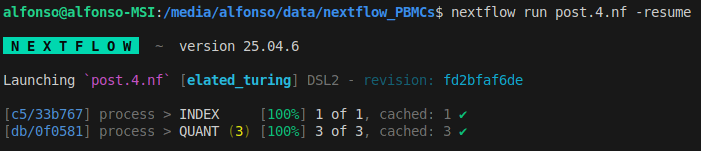
The code works the same way as before. Since we used the -resume flag, no new tasks needed to be run.
Configurable settings
Next thing to do is avoiding hardcoded paths and settings in the script.
Nextflow provides three ways, in addition to the hardcode approach, to set parameters:
- Command line parameters
- Params files
- Configuration files
Parameters can be declared in the main script using the params object, as we did in previous posts. This is helpful for developing and testing, but not ideal for working pipelines.
Parameters can also be configured on the command line by prefixing the parameter name with a double dash (--). This is useful for pipelines with a small number of parameters that change frequently.
Parameters specified on the command line can be also specified in a params file using the -params-file option when running nextflow. The -params-file option loads parameters for your Nextflow pipeline from a JSON or YAML file. This is useful for pipelines with many parameters and for documentation purposes.
Finally, parameters can be set in configuration files. Configuration files are written in a custom DSL and can be used to set parameters, configure executors, define profiles, and more. This is useful for pipelines with many parameters that change infrequently and need to be shared among multiple users or environments.
Parameters are applied in this order, so lowest to highest priority:
- Parameters defined in pipeline scripts (useful for hardcoded defaults)
- Parameters defined in config files
- Parameters specified in a params file (-params-file)
- Parameters specified on the command line (--parameter_name)
I tend to use config files to set the parameters because it also allows to set other configurations (i.e. docker). Keeping all in the same file is very useful for documentation purposes. Create a file named nextflow.config in the same directory as the main script with the following content:
 1// Enable Docker
 2docker {
 3    enabled = true
 4}
 5
 6// setting parameters
 7params {
 8    referenceFASTA = 'reference/refdata-gex-GRCh38-2024-A/fasta/genome.fa'
 9    referenceGTF = 'reference/refdata-gex-GRCh38-2024-A/genes/genes.gtf.gz'
10    sample_info = 'sample_info.tsv'
11    outdir = 'results_full'
12}
Now we can remove the hardcoded paths from the main script and just use the params object to access the parameters.
1nextflow run post.4.nf -resume
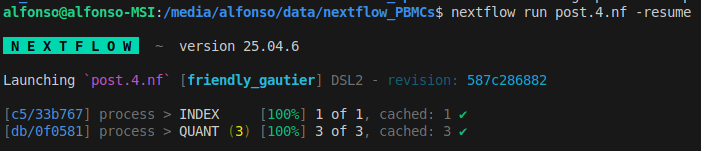
Again, we see that nothing was run since we used the -resume flag and there were no functional modifications.
Great, our workflow can process multiple samples using configurable settings, and it is modularized. Next steps would be polishing the workflow and adding extra steps of the analysis. We will do it in next posts.
Official Nextflow Documentation Links
Modularization:
- Main Modules Documentation: https://www.nextflow.io/docs/latest/module.html
- Training Documentation: https://training.nextflow.io/2.2/es/basic_training/modules/
Command Line Parameters:
- Main CLI Documentation: https://www.nextflow.io/docs/latest/cli.html#pipeline-parameters
- Training Documentation: https://training.nextflow.io/2.2/es/basic_training/config/#parameters
Configuration Files:
- Main Configuration Documentation: https://www.nextflow.io/docs/latest/config.html
- Training Configuration Documentation: https://training.nextflow.io/2.2/es/basic_training/config/#configuration-files
Key Documentation Sections:
- Parameter Priority Order: https://www.nextflow.io/docs/latest/cli.html
- Configuration Syntax: https://www.nextflow.io/docs/latest/config.html#syntax
- Process Configuration: https://www.nextflow.io/docs/latest/config.html#process-configuration
BONUS
QUANT module
Here is the code to create folder and main.nf file.
1mkdir -p modules/simpleaf/quant
2touch modules/simpleaf/quant/main.nf
This is the include statement to add to the main script
1include { QUANT as QUANT } from './modules/simpleaf/quant/main.nf'
post.4.nf
 1/*
 2 * Pipeline parameters
 3 */
 4
 5// reference genome path
 6params.referenceFASTA = 'reference/refdata-gex-GRCh38-2024-A/fasta/genome.fa'
 7params.referenceGTF = 'reference/refdata-gex-GRCh38-2024-A/genes/genes.gtf.gz'
 8// sample info
 9params.sample_info = 'sample_info.tsv' // path to sample information file
10
11// output directory
12params.outdir      = "results_full"
13
14// Include modules
15include { SIMPLEAF_INDEX as INDEX } from './modules/simpleaf/index/main.nf'
16include { QUANT as QUANT } from './modules/simpleaf/quant/main.nf'
17
18workflow {
19
20    // define input files
21    fasta = file("${params.referenceFASTA}") // reference fasta
22    gtf = file("${params.referenceGTF}") // annotation GTF
23
24    // Load sample information from TSV file
25    sample_info = Channel.fromPath(params.sample_info)
26        .splitCsv(header: true, sep: '\t')
27
28    // INDEX creation
29    index = INDEX(
30        fasta,
31        gtf
32    )
33
34    // prep for quantification
35    quant_input = sample_info
36        .map { x ->
37            def files_R1 = file("${x.sample_path}/*${x.reads1_pat}*", checkIfExists: true)
38            def files_R2 = file("${x.sample_path}/*${x.reads2_pat}*", checkIfExists: true)
39            tuple(x.sample_id, x.chemistry, files_R1, files_R2)
40        }
41
42    // Alevin-fry quantification
43    quant = QUANT(
44        index.index_path,
45        quant_input
46    )
47}