Claude Code for Bioinformaticians: Your AI Coding Assistant in the Terminal
Claude Code is revolutionizing how bioinformaticians work, transforming what once required hours of manual coding into conversational commands executed in seconds. Imagine delegating the tedious task of parsing thousands of FASTQ files, building complex genomic analysis pipelines, or debugging that frustrating Biopython script—all from your terminal with natural language. For researchers drowning in NGS data, wrestling with multiple programming languages, or spending more time coding than analyzing, Claude Code offers something remarkable: an AI coding agent that understands both the technical intricacies of sequence alignment algorithms and the biological context of why you're running them. It's not just about writing code faster; it's about freeing bioinformaticians to focus on the science—asking bigger questions, exploring novel hypotheses, and making discoveries—while Claude Code handles the implementation details that have traditionally consumed so much valuable research time.
Claude Code is a command-line tool that lets developers delegate coding tasks directly to Claude from their terminal. Instead of switching between your IDE and a chat interface, you can ask Claude to write, debug, refactor, or explain code right where you're already working. It acts as an agentic coding assistant that can understand your project context, execute multi-step tasks, and iterate on solutions—turning natural language instructions into working code while you stay in your development flow.
Today's post we are going to see how to install and set up claude code.
Edited to include Opus 4.6 that was realeased the same day I published this post
Installation
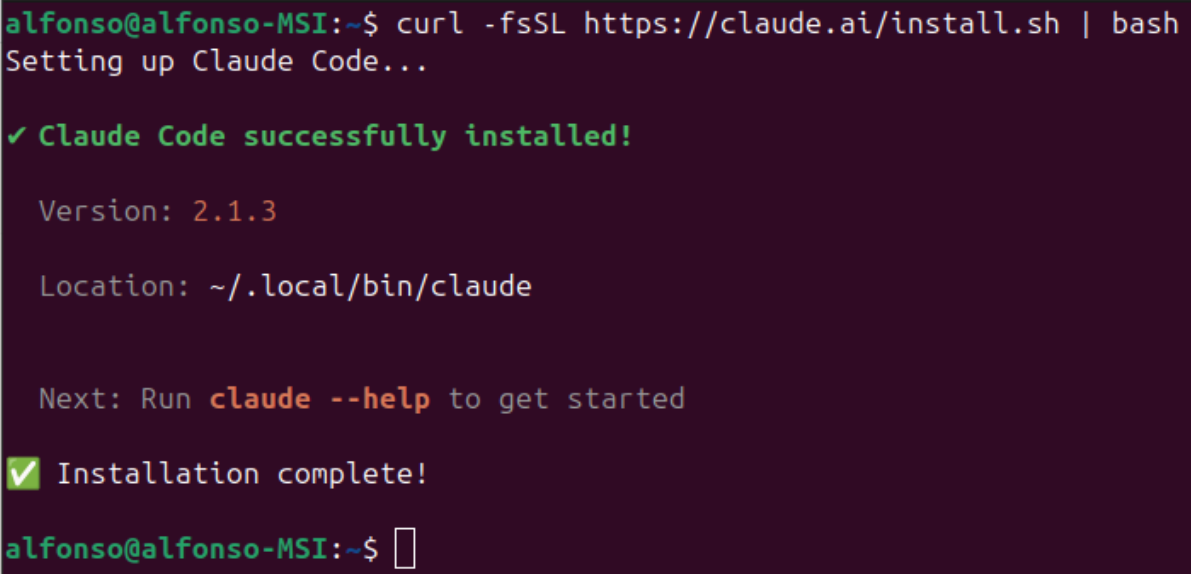
We start by executing the following code as indicated in the official documentation. Just follow the instructions for your OS.
1curl -fsSL https://claude.ai/install.sh | bash
and that's it! You already have a working installation, nothing else is needed.
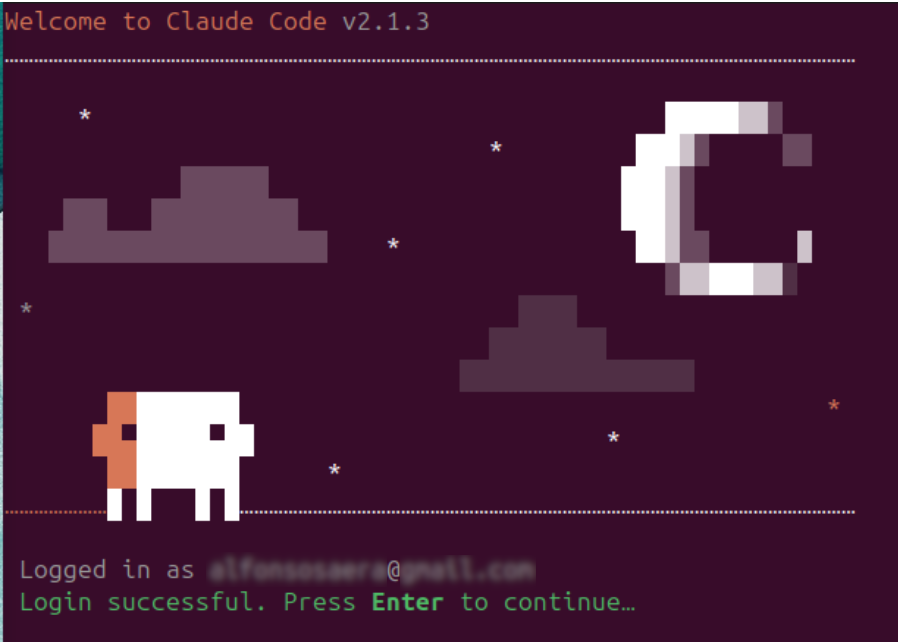
Now, to run claude code just run claude in any terminal. The first time, you will be asked about the login method
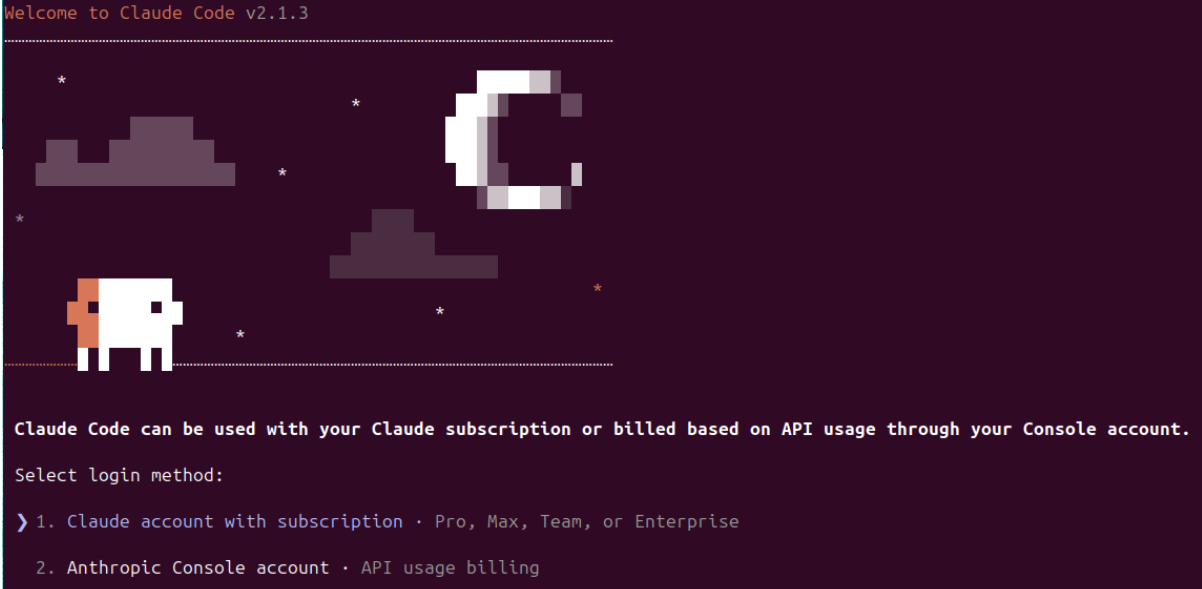
Since I have a Pro plan, I selected option 1 (use cursors to move up and down and enter to select). Then it opens a browser
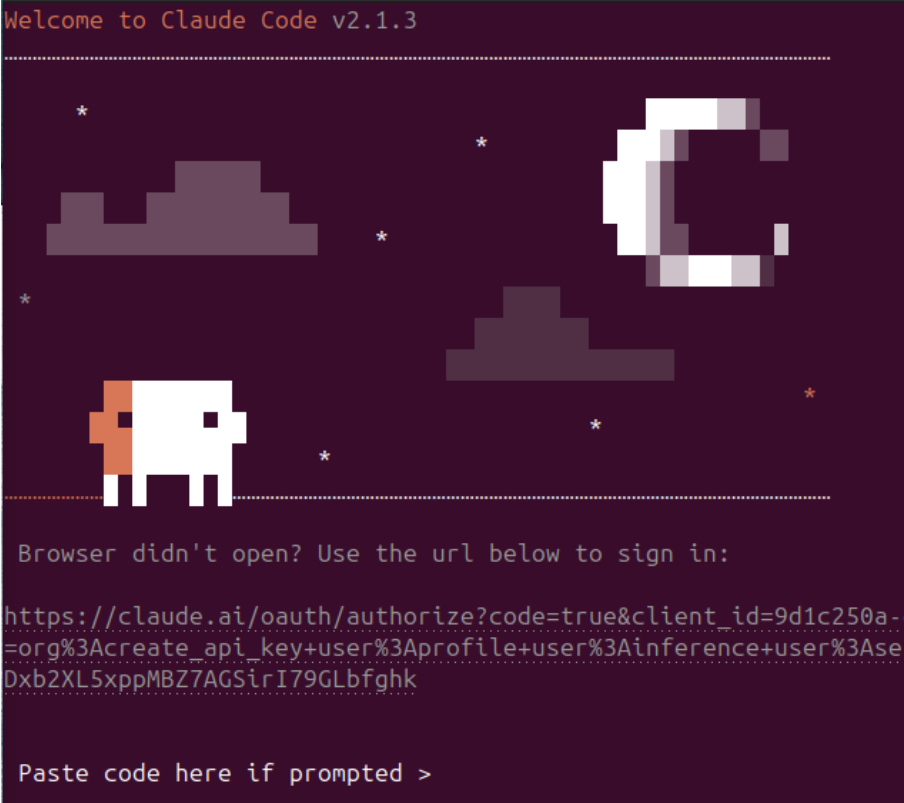
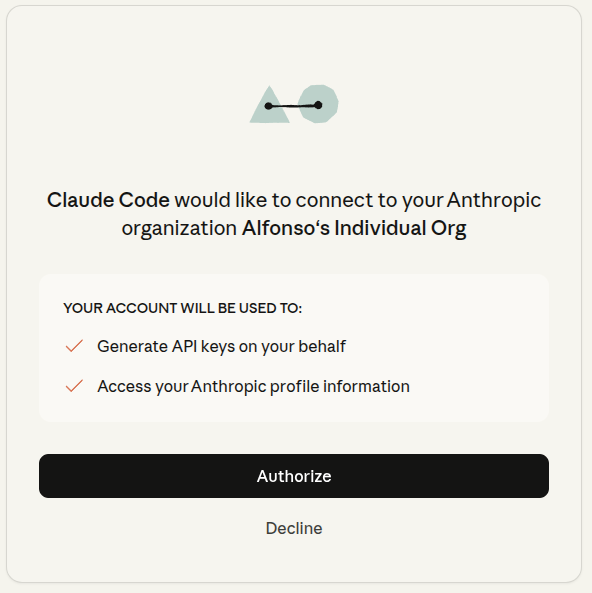
and you just need to authorize claude
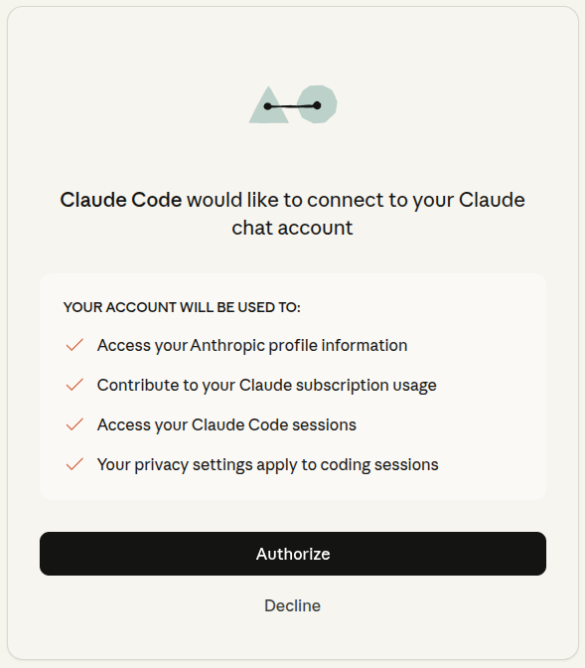
and press enter back in the terminal
last Security notes
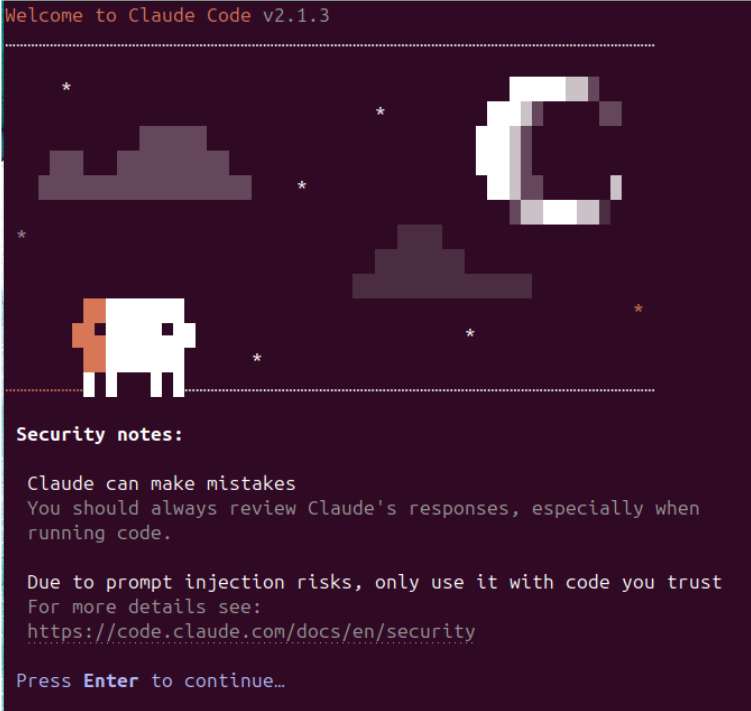
and you are ready to go.
Status line customization
The status line in Claude Code is the real-time display at the bottom of your terminal that shows Claude's current activity, progress, and what it's working on as it executes your coding task.
Its default configuration is not very informative, but likely enough we can customize it. I found out about this in this tutorial
And it is as easy as asking Claude Code to do it
1/statusline I am using ubuntu. This needs to be setted globally. Please use a separate .sh file for the script.
Then follow what Claude tells you. I did the following to set up my status line
1/statusline Please add these to the statusline, in order:\
2- Model name\
3- Progress bar\
4- Percentage context used\
5- Tokens\
6- Git branch\
7- Project name
As the video says, many times it does not get it right at the first time. You can ask for a debug file (json file) and inspect it to tell Claude Code the exact name of the value that needs to be printed.
In ubuntu you will need to install
jqso Claude Code can read json files.
In my case, I had to manually make the sh script executable using chmod +x
Once it is working, it is time to set up the colors. Just ask Claude Code to set up the colors as follows:
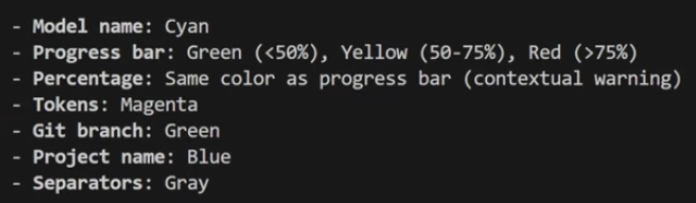
and your status line should look like this one

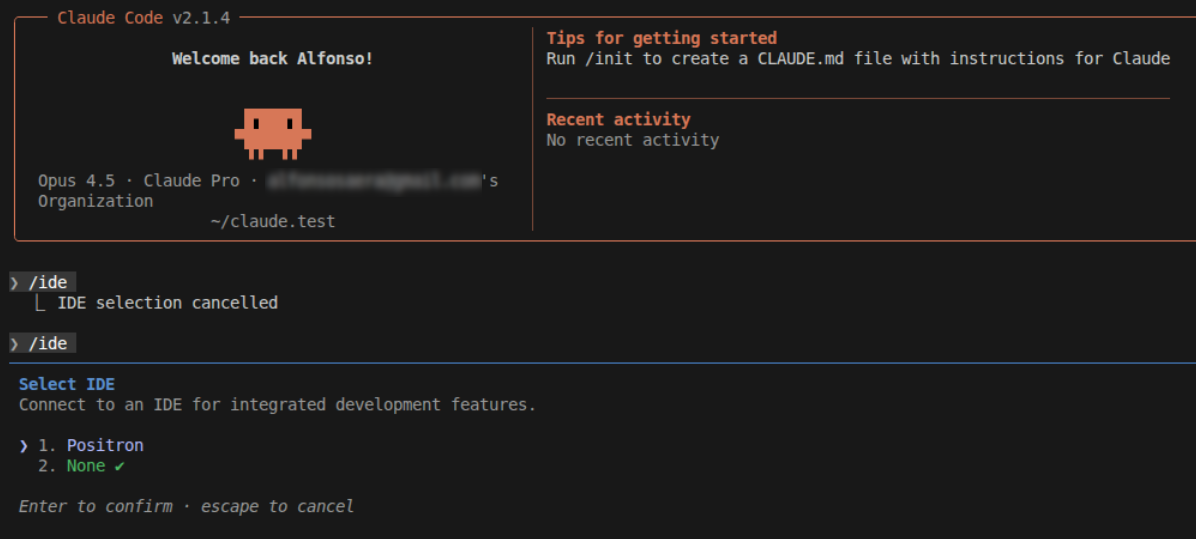
Claude in IDEs
As long as you have a terminal, you can use Claude Code anywhere. However, I prefer using it on Positron (if you are bioinformatician and do not know what this is better google it!).
It is as simple as running it inside the terminal of Positron but I highly recommend installing the Claude Code for VS Code so it can interact directly with the IDE, know the file you are, see the lines you highligth ...
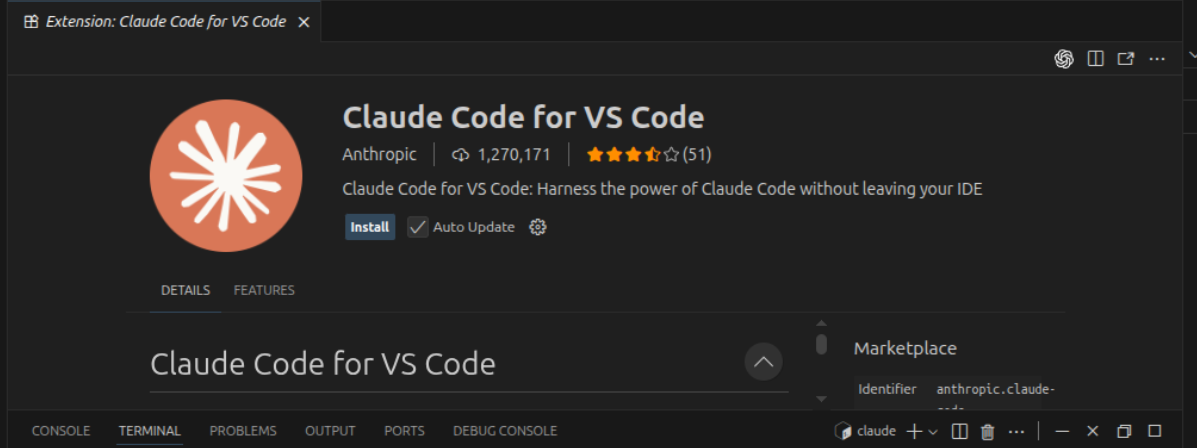
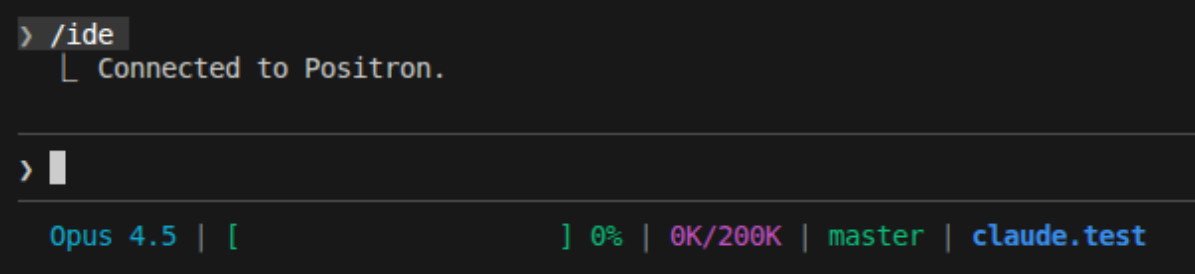
and the using the /ide command to connect to the IDE (you can select if have more than one active).
Claude.md file
The claude.md file is a project-specific instruction file that tells Claude Code how to work with your bioinformatics pipeline, and it's very useful for ensuring Claude handles your genomic data and analyses correctly. By placing a claude.md file in your project root, you can specify which file formats you're using (FASTQ, BAM, VCF), explain your directory structure for raw and processed data, define standard quality control thresholds, document your preferred bioinformatics tools (BWA, GATK, Bioconductor packages), and clarify organism-specific conventions like reference genome versions or annotation databases.
This means Claude will consistently use the right parameters for your sequencing platform, understand your sample naming conventions, respect your data processing workflows, and avoid common pitfalls like mixing genome builds—essentially giving it the specific knowledge domain context that ensures every script it generates is immediately compatible with your existing bioinformatics infrastructure.
Two key commands are important to work with the claude.md:
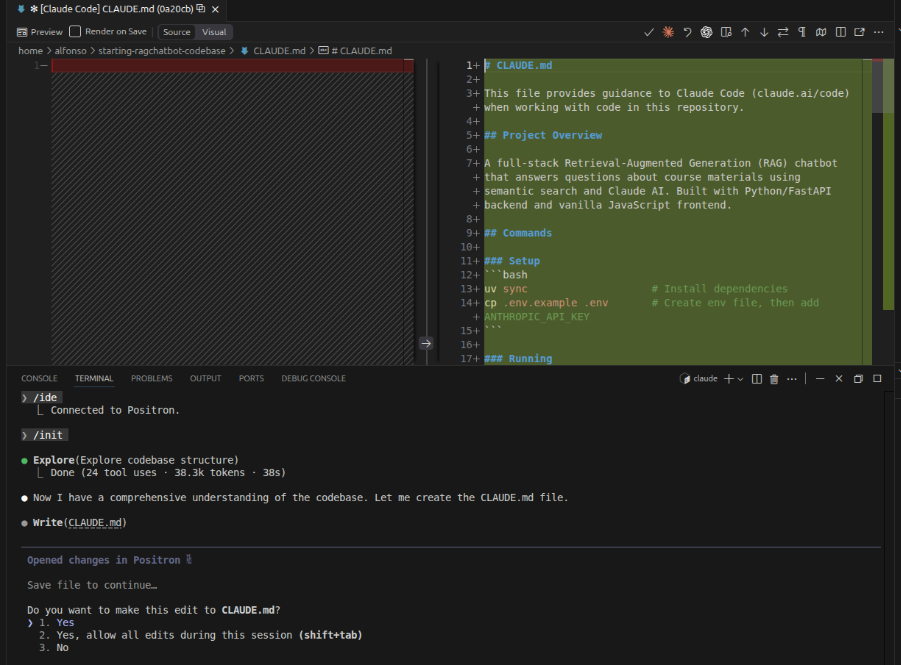
/initadd to memory
The /init command initializes Claude Code in your project directory by creating essential configuration files, including the claude.md file where you can define project-specific instructions. It's the recommended first step when starting to use Claude Code in a new project, as it sets up the foundation for Claude to understand your project and work effectively within its context.
The #add to memory command allows you to save important information, decisions, or context directly into Claude's memory for that project, so it remembers key details across multiple sessions. This is particularly useful for noting things like "always use hg38 as the reference genome" or "our RNA-seq pipeline uses STAR aligner with these specific parameters".
Claude Code Modes
Claude Code offers three different operational modes that give you varying levels of control over how it executes tasks. You can cycle through these modes by pressing Shift+Tab and the status line will show the active mode.
Edit mode is the default mode where Claude Code executes tasks with manual approval for each change. When you give it a command like "create a script to filter VCF files by quality score," Claude will write code and show you each file change, waiting for your approval before proceeding. This is the standard workflow that balances safety with efficiency.
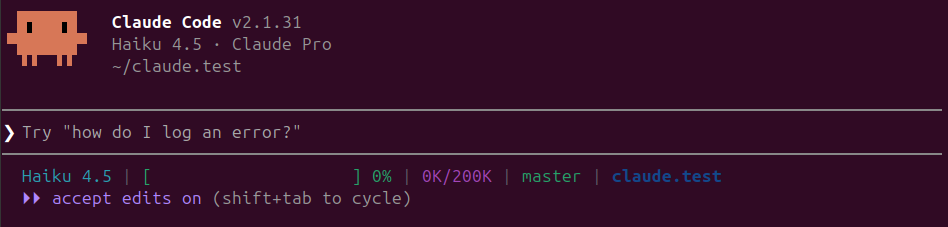
Auto-accept edits mode (indicated by ⏵⏵ accept edits on in the status line) automatically accepts all file edits without asking for approval each time. Press Shift+Tab once from normal mode to activate it. This mode is perfect for straightforward tasks where you trust Claude to handle the implementation details without interruption, letting you focus on other work while it completes the task. However, note that "accept edits on" only auto-approves edit operations—other actions like bash commands may still require confirmation depending on your permissions settings.
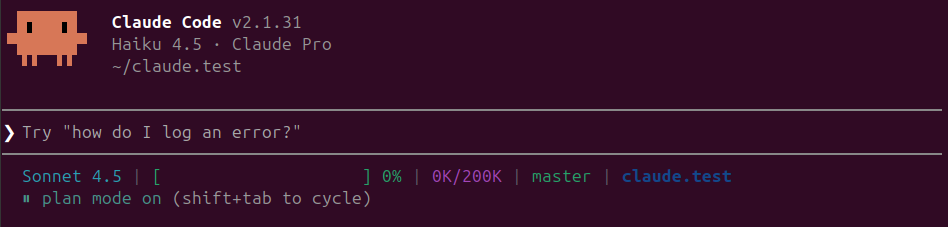
Plan mode (indicated by ⏸ plan mode on in the status line) makes Claude first outline its approach before executing anything. Press Shift+Tab twice from normal mode to enter plan mode. Instead of jumping straight into code, Claude will create a comprehensive plan of what it intends to do—which files it will create or modify, what logic it will implement, and how it will structure the solution. Claude operates in read-only mode while planning, so no files are changed during this phase. You can review the plan, ask for modifications, or approve it before Claude proceeds with implementation.
Note that
Plan modewill change toSonnet 4.5model no matter your selection (see AI Model section)
For most bioinformatics work, I recommend starting with plan mode and then switching to edit or auto-accept mode depending on your preferences.
Managing Context Window
Claude Code operates with a 200K token context window—think of it as Claude's working memory that holds everything it needs to understand your project: system prompts, CLAUDE.md files, conversation history, MCP tool definitions, and your code. Managing this context effectively is crucial for maintaining Claude's performance and avoiding degraded responses. That is why we modified the status line to show the context in real time.
As your context window fills up, Claude's performance degrades. When you're working on bioinformatics pipelines with large codebases and complex analysis scripts, context can fill up quickly. Signs you need to manage context include:
- Short, vague responses when you expect detailed answers
- Claude "forgetting" earlier parts of the conversation
- Asking you to repeat information it should already know
- Significantly slower response times
Performance degradation accelerates non-linearly in the final 20% of the context window (80-100% capacity), so proactive management is essential.
Inspect your current context usage with /context
1/context
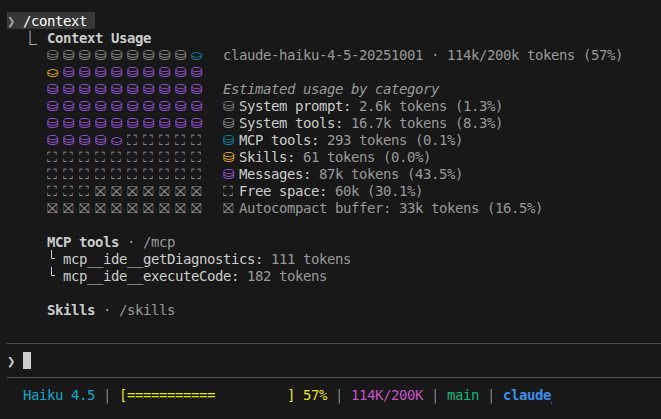
This shows a detailed breakdown of how your 200K tokens are being used across system prompts, CLAUDE.md files, conversation history, MCP tools, and response buffer. Use this to identify what's consuming space—often MCP servers you're not actively using are the biggest culprits.
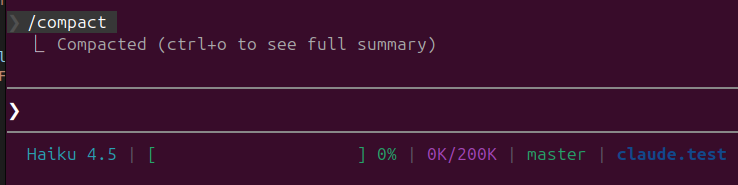
Compress conversation history with /compact
1/compact
This command summarizes your conversation history, freeing up tokens while preserving essential information. Claude automatically triggers compaction at 75-92% capacity, but manually compacting at 70% is usually recommended.
You can guide what to preserve: "Before we compact, remember we decided to use BWA-MEM for alignment because
of superior accuracy on long reads."
Start completely fresh deleting all context with /clear
1/clear
This wipes the entire conversation history from context, giving you a clean slate. Claude still has access to your files and CLAUDE.md, but all back-and-forth discussion is gone. Use /clear when:
- Switching between unrelated tasks (finished feature work, now fixing a bug)
- Claude gets confused or stuck in loops
- You've completed a major milestone and are moving to new work
For bioinformatics workflows, good context management means Claude can maintain focus on your current analysis without being distracted by earlier exploratory work or unrelated pipeline development.
AI Model Selection
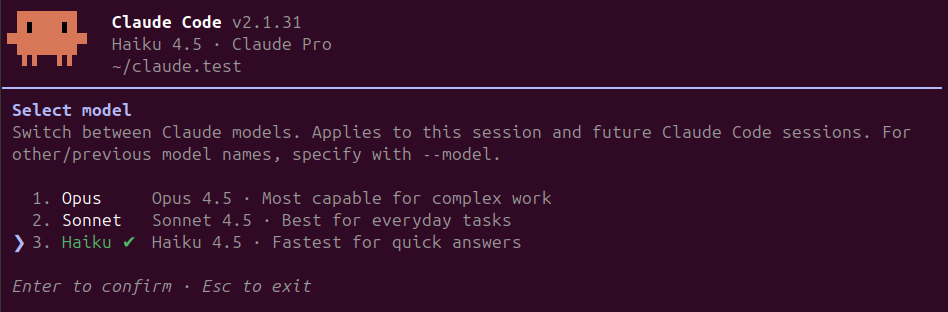
Claude Code supports multiple AI models from the Claude, each optimized for different types of tasks. You can switch between models at any time using the /model command. Models:
-
Claude Opus 4.6: The most capable model with state-of-the-art reasoning abilities. Perfect for complex architectural decisions, designing intricate bioinformatics pipelines, or tackling challenging algorithmic problems like optimizing sequence alignment workflows or designing novel analysis strategies.
-
Claude Sonnet 4.5: The balanced choice and default model for Claude Code. It offers excellent performance for most coding tasks at a reasonable cost. Ideal for your day-to-day bioinformatics work—writing analysis scripts, debugging code, refactoring pipelines, and implementing standard workflows.
-
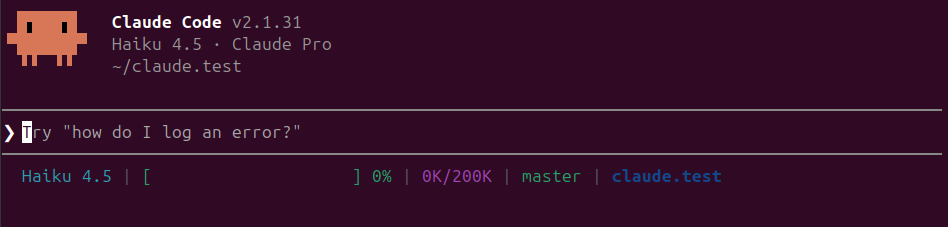
Claude Haiku 4.5: The fastest and most economical option, delivering about 90% of Sonnet's capability at 3× cost savings. Great for simpler tasks like formatting code, writing documentation, quick bug fixes, or generating boilerplate code for common bioinformatics operations.
The easiest way to change models during an active session is using the /model command and specify or select on the screen as follows:
1# Switch using shorthand (recommended)
2/model opus
3/model sonnet
4/model haiku
The model switch takes effect immediately for all subsequent requests. You can check your current model anytime by running /status or in the customized status line, which is very helpful.
Model Context Protocol (MCP) Integration
The Model Context Protocol (MCP) is an open standard that allows Claude Code to connect to external tools, databases, APIs, and data sources. Think of MCP servers as plugins that extend Claude Code(and many other AI tools)'s capabilities beyond just writing code to search the web, query databases, read documentation, and much more.
Installing MCP Servers
Claude Code makes it easy to add MCP servers using the claude mcp add command. Check each mcp for specific instruction although they all follow a similar syntax.
Here an example to install playwright, which enables LLMs to 'see' web pages bypassing the need for screenshots or visually-tuned models.
Install it outside Claude Code as follows
1claude mcp add playwright npx @playwright/mcp@latest
then check the MCP servers installed and their status in the terminal
1claude mcp list
or use the /mcp command in Claude Code
1/mcp
When adding MCP servers, you can control where they're available using the --scope flag for the claude mcp add command:
--scope local(default): Available only to you in the current project directory--scope project: Shared with your team via a.mcp.jsonfile in the project (can be version controlled)--scope user: Available to you across all projects
1claude mcp add --scope local playwright npx @playwright/mcp@latest
More info in the Claude Code Docs
Anthropic note from documentation: Use third party MCP servers at your own risk - Anthropic has not
verified the correctness or security of all these servers. Make sure you trust MCP servers you are installing.
Be especially careful when using MCP servers that could fetch untrusted content, as these can expose you to
prompt injection risk.
Usage
Understanding and monitoring your token usage is crucial when working with Claude Code, especially for bioinformaticians running computationally intensive analysis pipelines that can quickly consume your allocation.
Claude Code operates on a rolling 5-hour session window with usage limits that vary by subscription tier. According to Anthropic's official documentation, these limits are shared across all Claude products (web, desktop, mobile, and Claude Code) and reset every 5 hours. While Anthropic does not publicly document exact token counts, community observations suggest approximate limits of:
- Pro: ~44,000 tokens per 5-hour window
- Max 5x: ~88,000 tokens per window
- Max 20x: ~220,000 tokens per window
Note: These are approximate community-observed values and may vary. Anthropic does not officially publish specific token limits, and actual capacity can depend on factors like codebase size, model selection, and usage patterns.
Token consumption adds up quickly when working with large codebases, complex genomic data processing scripts, or detailed documentation.
Claude Code includes a built-in /usage command that displays real-time usage statistics directly in your terminal
1/usage
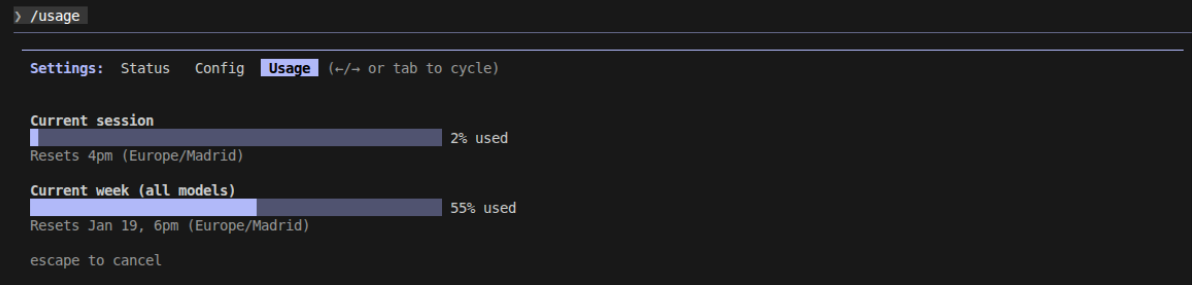
This command shows:
- Current Week Usage (All Models): Combined token usage across Sonnet and Haiku models, with weekly reset schedule
- Current Session: Tokens consumed in your active 5-hour window
- Reset Timers: When your usage limits will refresh
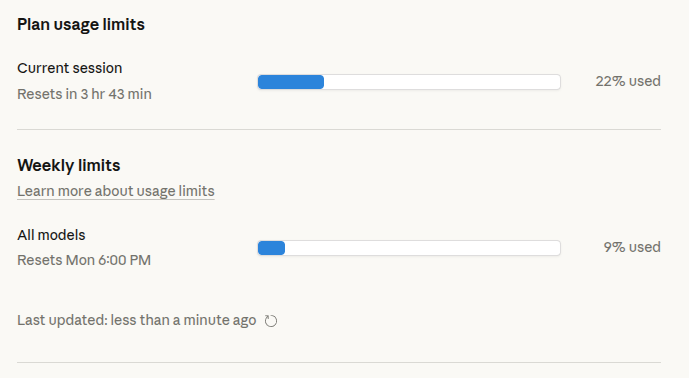
You can also find the same information on the web (https://claude.ai/settings/usage), which allows to check it in real time while a command is running
Some tips:
- Check before big tasks: Run
/usagebefore starting major refactoring or analysis pipeline generation to ensure you have enough tokens - Monitor burn rate: If you're consuming tokens rapidly, consider breaking complex tasks into smaller sessions or switching to a more efficient model (Sonnet instead of Opus for routine tasks)
- Use
/clearbetween unrelated tasks: Starting fresh removes stale context and prevents wasting tokens on irrelevant conversation history - Plan mode first: Use plan mode (Shift+Tab twice) for complex tasks—Claude outlines the approach before writing code, helping you catch issues early and avoid costly rework
- Consider your model choice: Use Haiku for simple tasks, Sonnet for most work, and reserve Opus for complex architectural decisions
Instead of using your plan, or when hitting a limit, you can also use Claude Code with an API key. You will need an user in the Claude Console platform and to add some credit.
Use /login to choose between account subscription or API key.
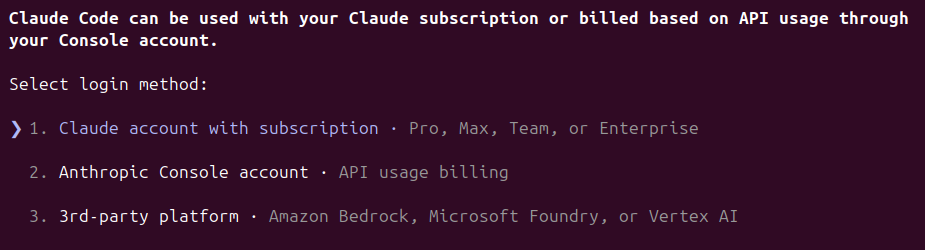
The '3rd-party platform' option is new to me. If you want to share some info in the comments I will update the post.
you will be prompted to another browser to allow Claude Code to set up a dedicated key. Again just click Authorize, and enter back in Claude Code.

and Claude will notify you the change of login

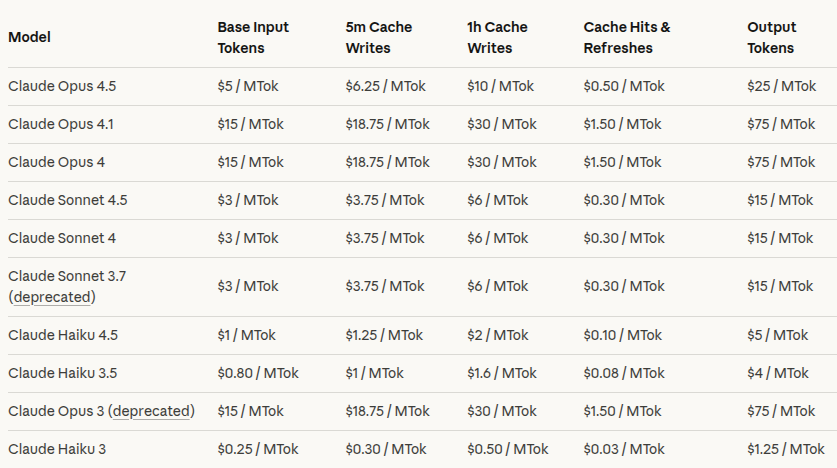
Now you use the /cost command instead of /usage inside Claude Code or the Usage and Cost sections of the Claude Console platform

This is the current pricing at the time of writing the post, from the claude platform webiste
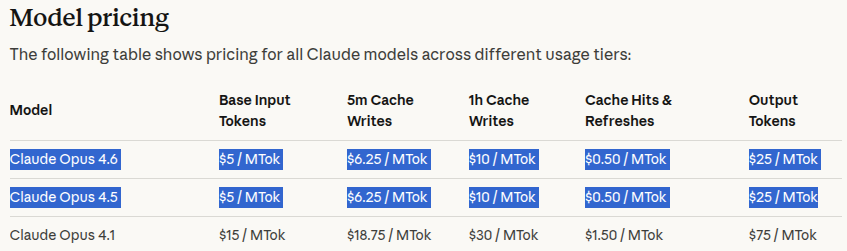
Edited to add the pricing of the recently released Opus 4.6 model
There is a discussion along the community regarding excesive usage limits in Claude Code, or Claude in general.
Since I started using it recently, I am not sure what to think about it. Let me know your thoughts in the comments.
You can check this github issue for example https://github.com/anthropics/claude-code/issues/16157
Further reading
There are tons of resources out there about Claude Code and how to use it for bioinformatics, I leave here some that I liked or would like to read.
- DeepWiki Claude Code Ultimate Guide, which appears to be a community-maintained comprehensive guide based on official Claude Code behavior and documentation
- Claude documentation on Choosing a model
- Anthropic post Effective harnesses for long-running agents
- Youtube tutorial Your Claude Code Terminal Should Look Like This
- Youtube tutorial on long-runnig agents
- Free online course Claude Code: A Highly Agentic Coding Assistant
- Anthropic github autonomous coding
- Running Claude Code with local models Blog post
- Running Claude Code with local models Youtube tutorial
- Open source alternative to Claude Code? Accomplish