OpenClaw Setup
OpenClaw is an open-source AI assistant that doesn’t just answer questions—it actually does things for you. It runs on your own computer and connects to apps you already use, like WhatsApp or Telegram, so you can simply message it as if you were chatting with a person. Behind the scenes, it uses powerful AI models to understand your request, then takes real actions—like sending emails, organizing your calendar, or researching information—by interacting with your files and online services. In essence, it works like a digital personal assistant that can both think and act, turning simple chat instructions into automated tasks across your digital life.
Today's post will show you how to install and set up OpenClaw on your machine. Since it can literally do anything in your computer, I decided to go with a docker installation to limit what can and cannot access on my computer, other options are running it on the cloud, a virtual machine, or in a dedicated computer (mac mini is becoming extremely popular because of this).
Requirements
- Docker Engine + Docker Compose v2
- At least 2 GB RAM for image build
- Enough disk for images + logs
Verify your Docker Compose version:
1docker compose version
1Docker Compose version v2.29.7
Installation
Clone the official repository:
1git clone https://github.com/openclaw/openclaw.git

Move into the cloned folder and run the setup script:
1./docker-setup.sh
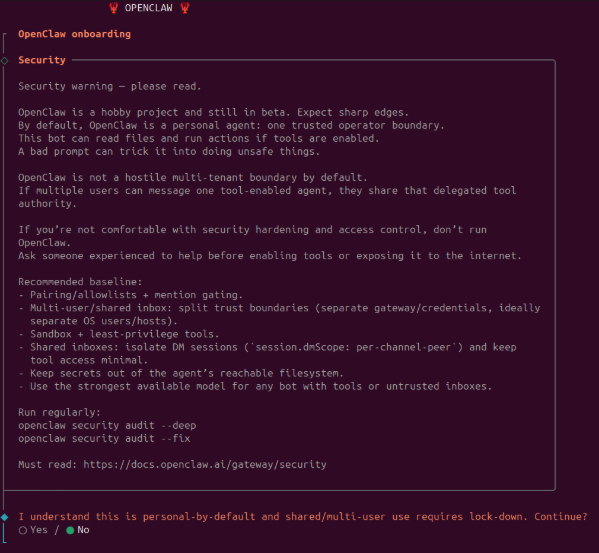
The installer launches an interactive onboarding wizard. The first screen is a security warning — read it carefully. OpenClaw is a personal agent: it can read files and run actions, so start with the smallest access that works.
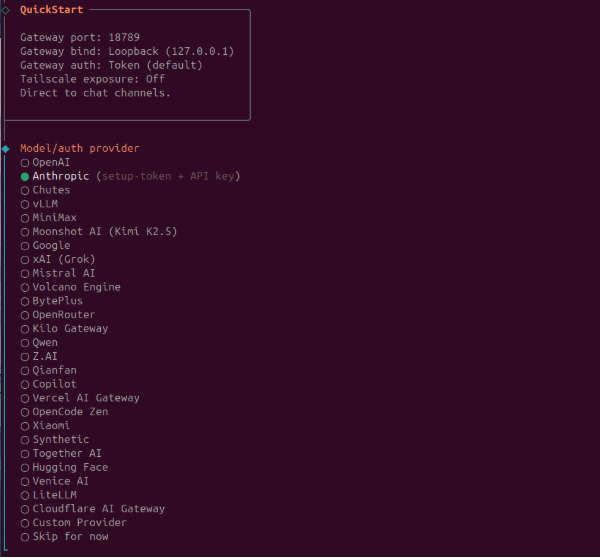
Accept the warning and select QuickStart to proceed with sensible defaults (gateway on localhost:18789, token auth).

Select the model/auth provider. I chose Anthropic because I use Claude Code.
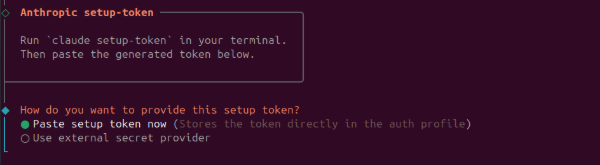
Choose Anthropic token (setup-token) as the auth method.
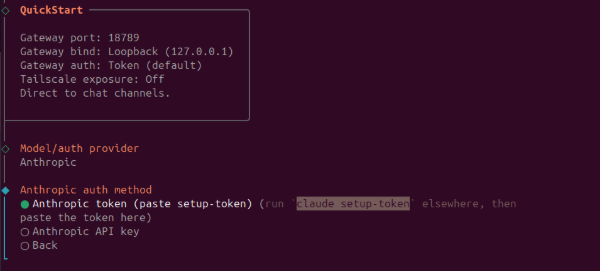
Claude token
The installer instructs you to run claude setup-token in a separate terminal. This opens a browser OAuth flow.

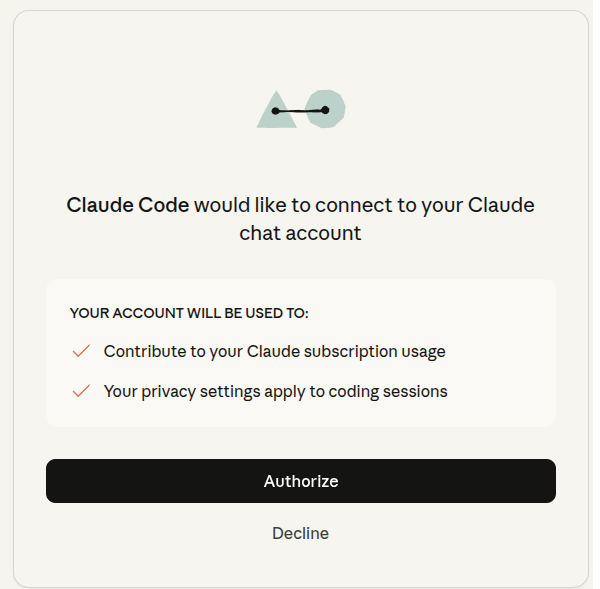
After authorizing, the terminal prints your OAuth token (valid for 1 year). Copy and store it in a safe place since you will not see it again.
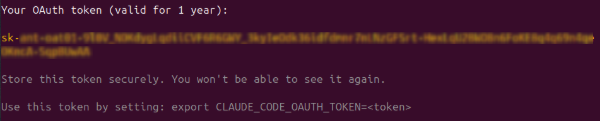
Back in the OpenClaw installer, select Paste setup token now
and paste the token

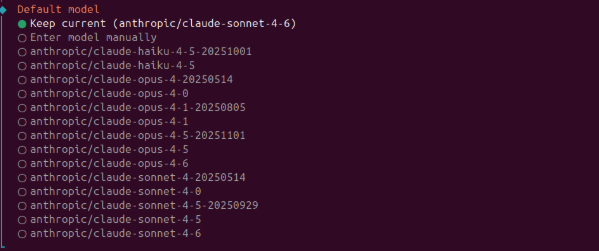
Select your default model. I use anthropic/claude-sonnet-4-6 because in a previous test openclaw health checker told me Haiku is too simple and can be exploited.
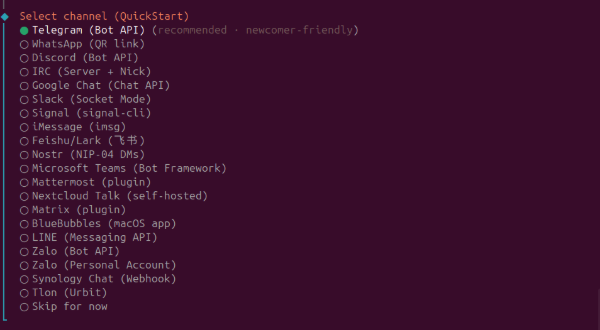
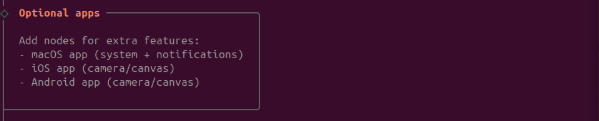
The installer shows the status of all supported channels and explains how DM pairing works.
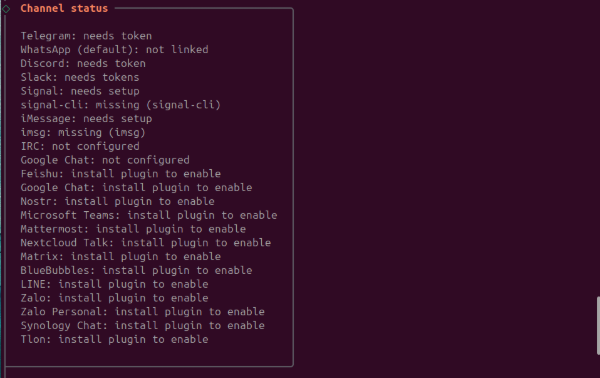
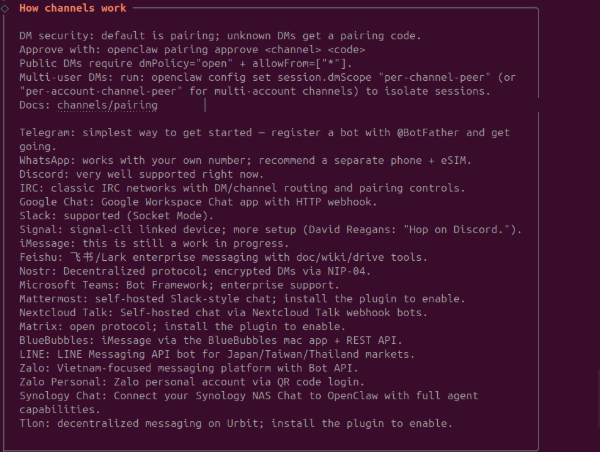
Select Telegram (Bot API), it is the recommended newcomer-friendly option.
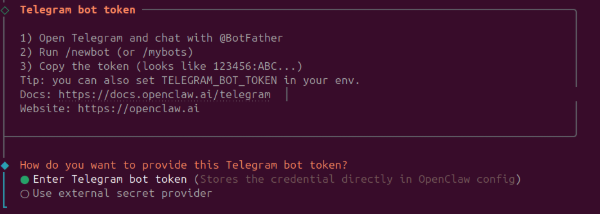
The installer explains how to obtain a Telegram bot token from @BotFather.
Telegram bot
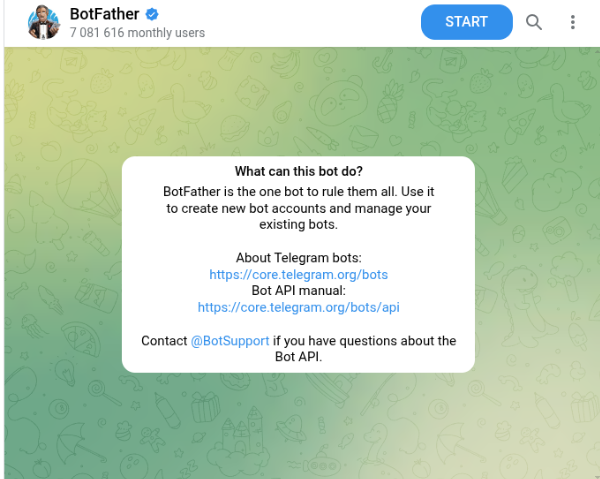
Open Telegram and start a chat with @BotFather. Send /newbot.

Choose a display name (openclaw)
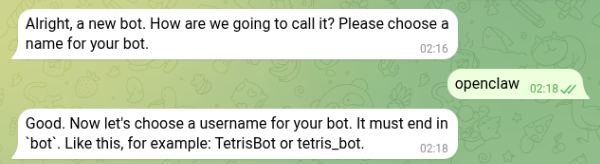
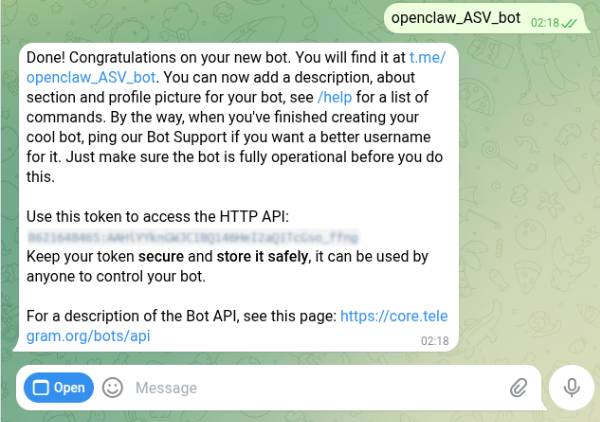
and a username ending in bot (openclaw_ASV_bot). BotFather returns an API token.
Click the bot link to open it and send /start.
Paste the Telegram bot token into the OpenClaw installer.

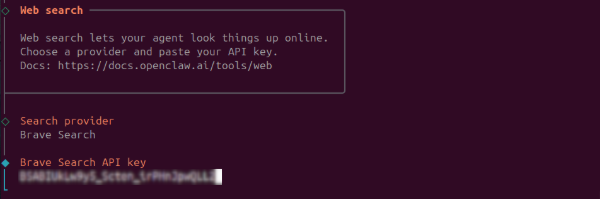
Brave Search
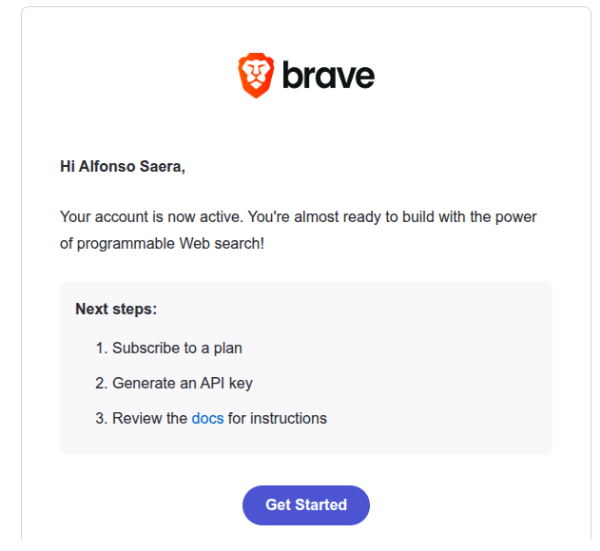
OpenClaw can give your agent real-time web search via the Brave Search API. Go to https://brave.com/search/api/ and create an account.

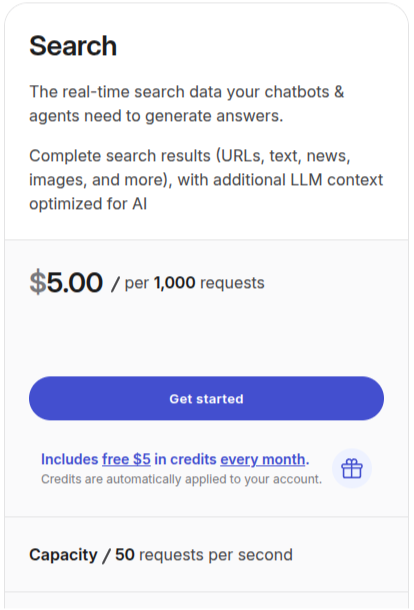
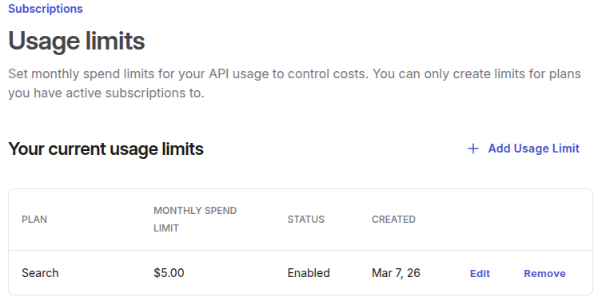
Subscribe to the Search plan which is $5 per 1,000 requests with $5 in free monthly credits, so light usage costs nothing.
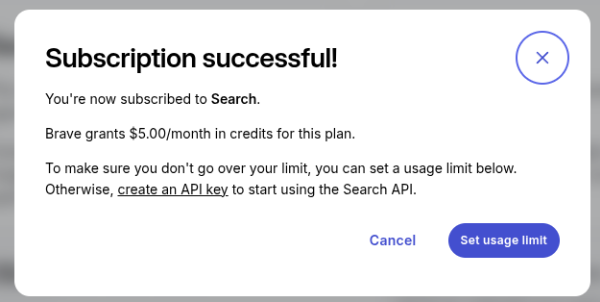
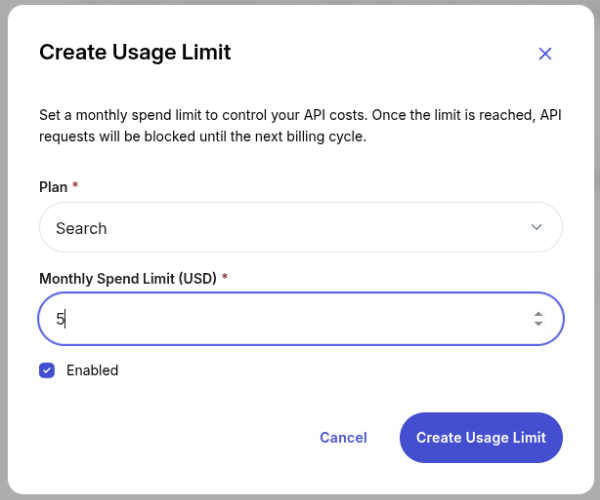
Set a monthly spend limit to avoid extra costs.
Generate an API key (named openclaw here).
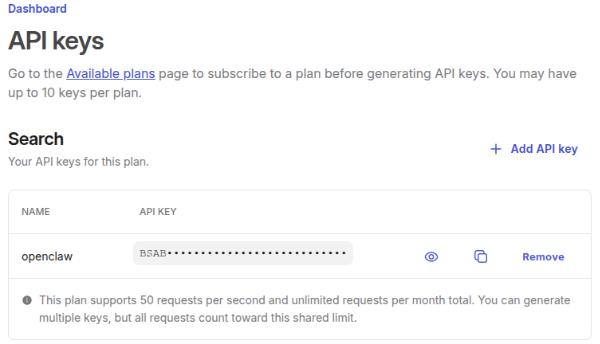
Paste the key into the OpenClaw installer when prompted.
Skills
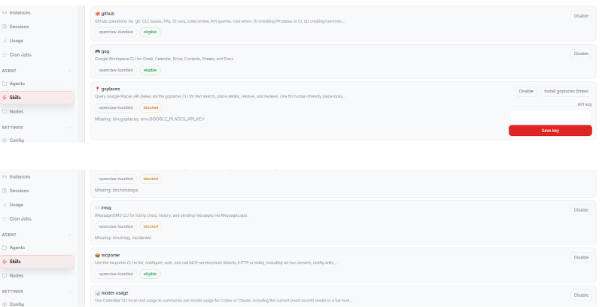
The installer detects available skills.
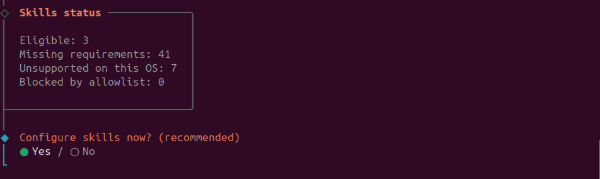
You can select here the skills to install.
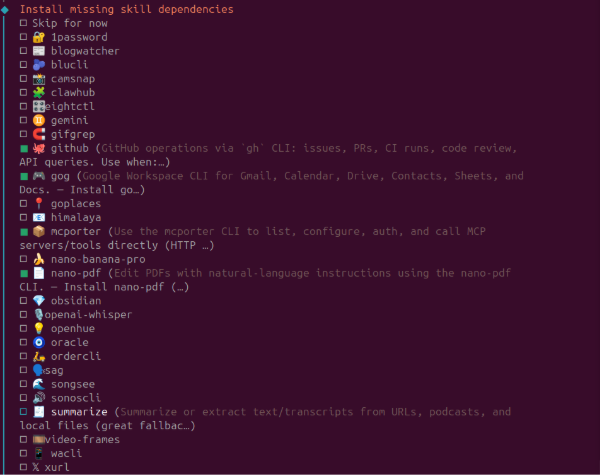
Since the installer is designed for any installation type, it provides the homebrew installation code
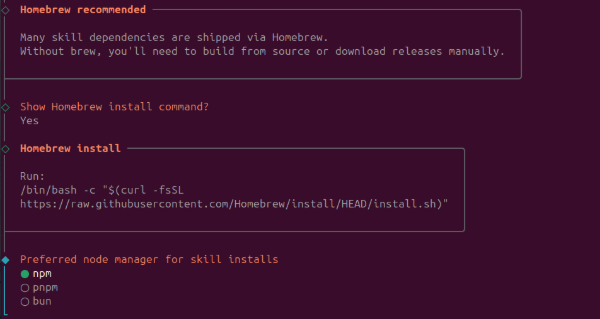
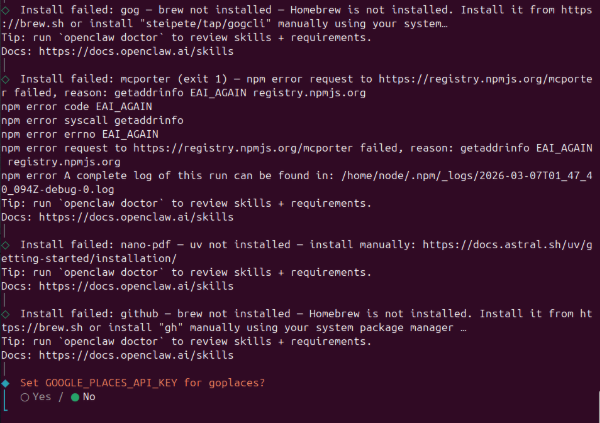
Skill installation fails because the docker image does not have homebrew, we will see how to fix this later.
Dedicated email
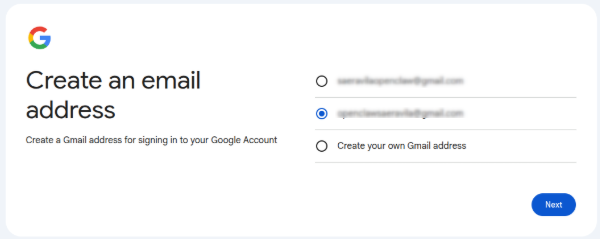
Go online and create a new Gmail account. It is a good practice to create a dedicated Gmail account for the bot to keep its credentials isolated from your personal account.
We skip the API keys, they will be configured later.
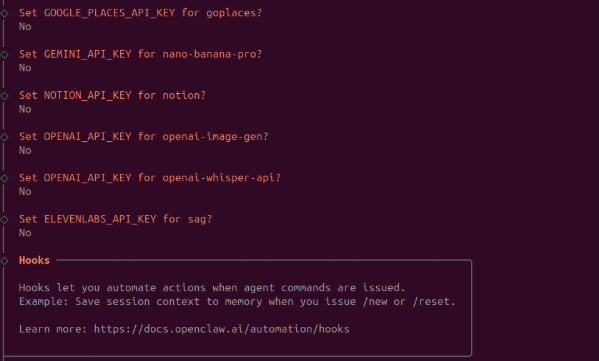
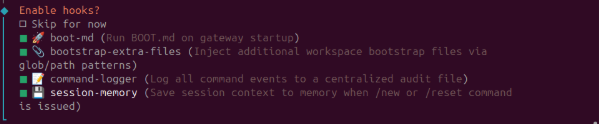
Bundled hooks
OpenClaw ships with four hooks that are automatically discovered:
- session-memory: Saves session context to
~/.openclaw/workspace/memory/when you issue/new - bootstrap-extra-files: Injects extra workspace files via glob/path patterns during
agent:bootstrap - command-logger: Logs all command events to
~/.openclaw/logs/commands.log - boot-md: Runs
BOOT.mdwhen the gateway starts (requires internal hooks enabled)
I enabled them all.
Dashboard
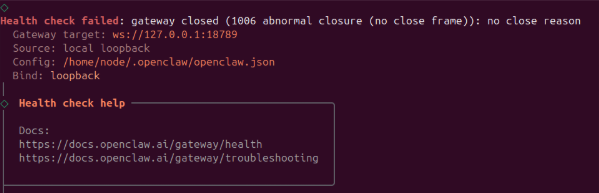
The final steps show systemd and health check messages. We start seeying errors that we will fix later.

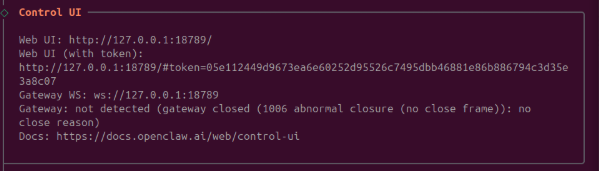
The installer prints the Control UI URL with the authentication token. Copy it in your browser to manage the gateway.
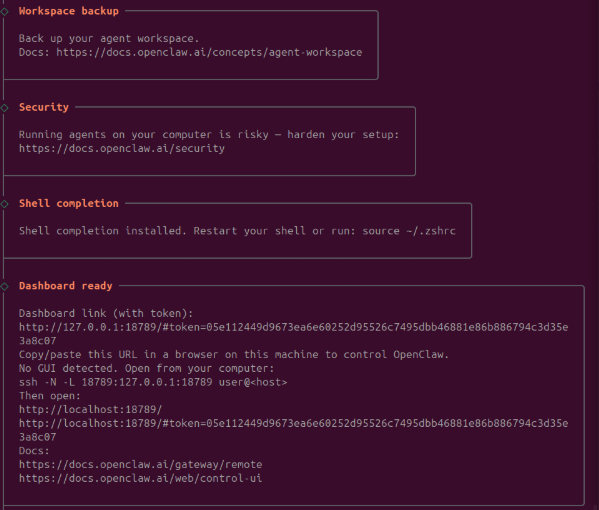
The process is complete.
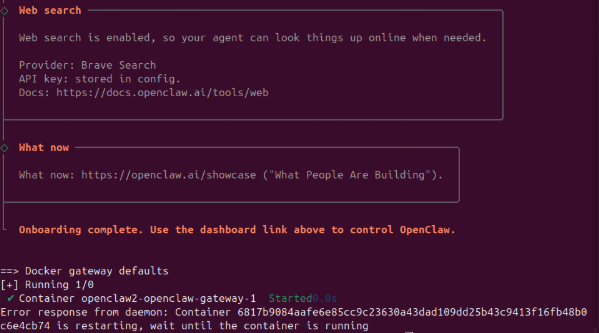
We see some errors that we will fix
Finalizing setting
Bind configuration
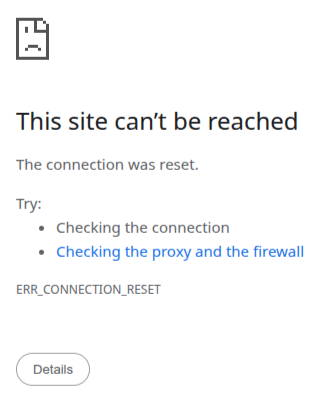
Now paste the URL into your browser, it will not open.
now go back to the terminal and inspect the logs
1docker compose logs -f openclaw-gateway
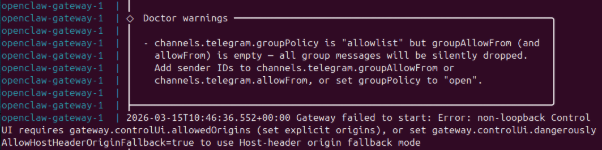
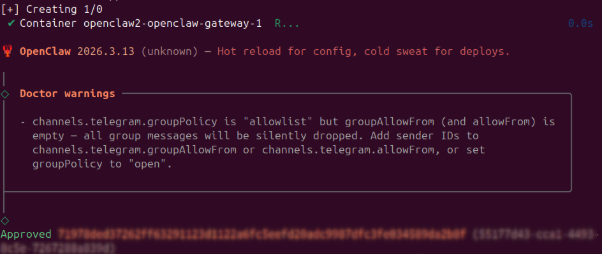
The Gateway does not start due to the configuration. See this GitHub issue. Basically, this is a expected security enforcement. In local installations, loopback bind is enough. However, we are using docker so we are technically accessing from outside the machine.
Modify the openclaw.json file from this:
1 "gateway": {
2   ...
3   "bind": "loopback",
4   ...
to
1 "gateway": {
2   "port": 18789,
3   "mode": "local",
4   "bind": "lan",
5   "controlUi": {
6     "allowedOrigins": ["http://127.0.0.1:18789"]
7   },
8   ...
now restart docker as follows:
1docker compose up -d
Pairing
give enough time to wake up and you will see the Control UI
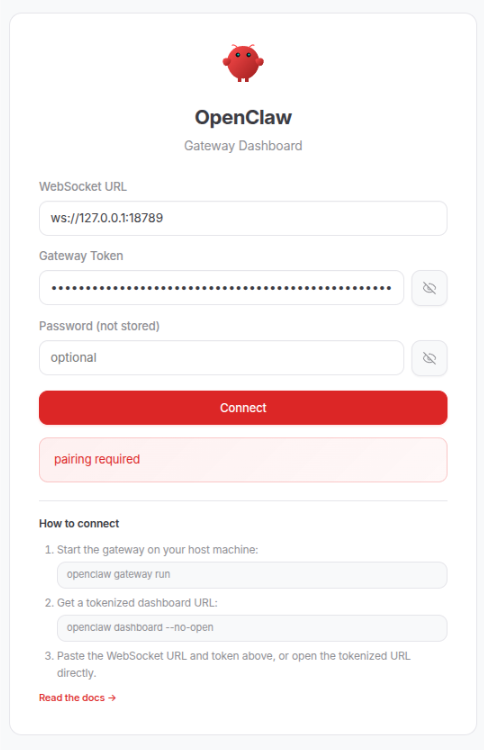
as it says, now you must do the pairing. Go back to your terminal and run
1docker compose run --rm openclaw-cli devices list
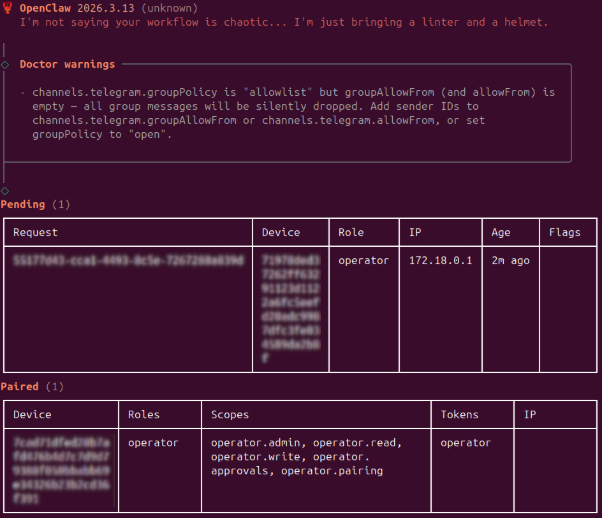
copy the request code from the Pending table and run the following pairing code
1docker compose run --rm openclaw-cli devices approve 55177d43-cca1-4493-8c5e-7267288a839d
Now you can click connect in the browser and the Control UI will be loaded.
Add telegram chat
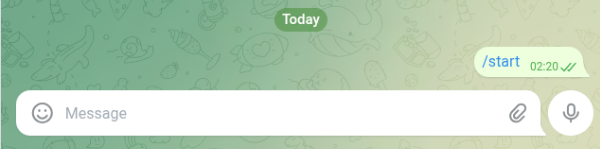
Go to your openclaw bot in telegram and type /start
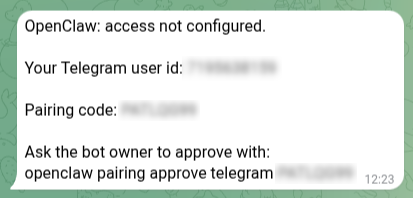
in the same folder of your yml file run the following command using the code provided by telegram to complete the pairing of the telegram bot
1docker compose run --rm openclaw-cli pairing approve telegram XXXXXXXX
Adding skills
Since we using docker, we must add the skills and the requirements in the image. We have two options set up variables or using a custom Dockerfile.
Environment variables
With ./docker-setup.sh, the OpenClaw’s Docker installer, you should set environment variables before running the script so the generated Docker setup includes the packages you want. It supports variables like:
OPENCLAW_DOCKER_APT_PACKAGES→ system packages installed via aptOPENCLAW_EXTENSIONS→ Node extensionsOPENCLAW_NODE_VERSION→ Node runtime version
These variables are read by ./docker-setup.sh when it builds the image.
The limitation is that OPENCLAW_DOCKER_APT_PACKAGES only accepts apt package names so will not work for my three selected skills:
- github skill needs
gh. gogskill needsgogcli.- mcporter skill needs
mcporter.
gh could be installed with OPENCLAW_DOCKER_APT_PACKAGES but gogcli and mcporter require a manual installation.
Custom Dockerfile
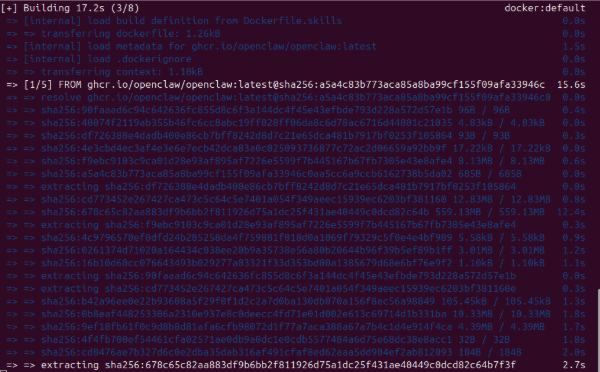
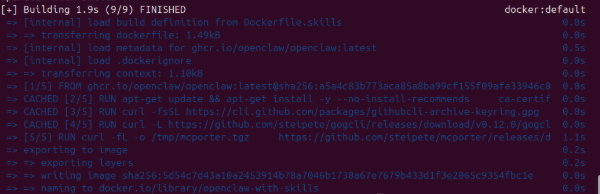
Since we need manual installations, the easiest and most reproducible approach is building a custom Dockerfile.
In the OpenClaw repo, create a file named Dockerfile.skills with this content
 1FROM ghcr.io/openclaw/openclaw:latest
 2
 3USER root
 4
 5# Install uv from the official Astral image
 6ENV UV_TOOL_BIN_DIR=/usr/local/bin
 7COPY --from=ghcr.io/astral-sh/uv:latest /uv /uvx /usr/local/bin/
 8
 9# Base utilities that are commonly useful
10RUN apt-get update && apt-get install -y --no-install-recommends \
11    ca-certificates \
12    curl \
13    git \
14    jq \
15    ripgrep \
16    && rm -rf /var/lib/apt/lists/*
17
18# GitHub CLI for the github skill
19RUN curl -fsSL https://cli.github.com/packages/githubcli-archive-keyring.gpg \
20    -o /usr/share/keyrings/githubcli-archive-keyring.gpg \
21    && chmod go+r /usr/share/keyrings/githubcli-archive-keyring.gpg \
22    && echo "deb [arch=$(dpkg --print-architecture) signed-by=/usr/share/keyrings/githubcli-archive-keyring.gpg] https://cli.github.com/packages stable main" \
23    > /etc/apt/sources.list.d/github-cli.list \
24    && apt-get update \
25    && apt-get install -y --no-install-recommends gh \
26    && rm -rf /var/lib/apt/lists/*
27
28# gog binary
29RUN curl -L https://github.com/steipete/gogcli/releases/download/v0.12.0/gogcli_0.12.0_linux_amd64.tar.gz \
30    | tar -xz -C /usr/local/bin \
31    && chmod +x /usr/local/bin/gog
32
33# mcporter package
34RUN curl -fL -o /tmp/mcporter.tgz \
35    https://github.com/steipete/mcporter/releases/download/v0.7.3/mcporter-0.7.3.tgz \
36    && mkdir -p /opt/mcporter \
37    && tar -xzf /tmp/mcporter.tgz -C /opt/mcporter --strip-components=1 \
38    && printf '#!/bin/sh\nexec node /opt/mcporter/dist/cli.js "$@"\n' > /usr/local/bin/mcporter \
39    && chmod +x /usr/local/bin/mcporter \
40    && rm -f /tmp/mcporter.tgz
41
42USER node
then build the image with
1docker build -f Dockerfile.skills -t openclaw-with-skills .
Next, add a small override file named docker-compose.override.yml to the same folder
 1services:
 2 openclaw-gateway:
 3   image: openclaw-with-skills
 4   volumes:
 5     - openclaw_home:/home/node
 6
 7
 8 openclaw-cli:
 9   image: openclaw-with-skills
10   volumes:
11     - openclaw_home:/home/node
12
13
14volumes:
15 openclaw_home:
openclaw_homeis a Docker named volume that is mounted inside the container at/home/node. It stores persistent data such as OpenClaw configuration, caches, browser downloads, and CLI credentials (e.g., gog OAuth tokens), so they survive container restarts or recreations. Without this volume, anything written under/home/nodewould be lost when the container stops.
Now we just need to restart the containers
1docker compose down
2docker compose up -d
and verify installation with skills check
1docker compose run --rm openclaw-cli skills check
or in the UI
First test
Start chatting with it, in the dashboard (or in telegram)
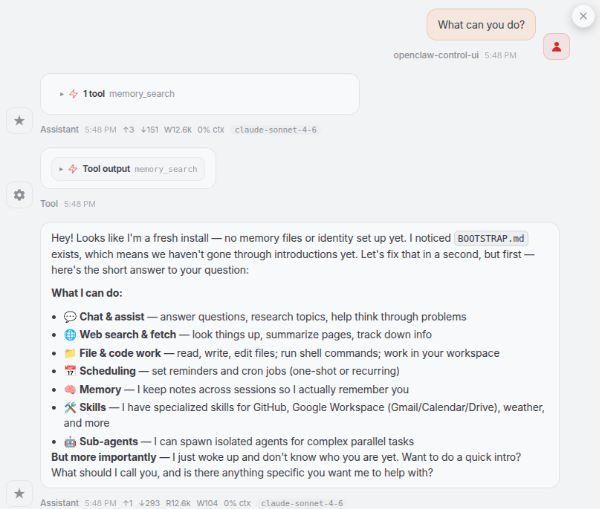
It explains and start the autoconfiguration
Connect to gmail
The simplest way to connect Openclaw to Gmail is through the gogcli skill that provides unified access to Google Workspace services including Gmail, Calendar, Drive, Contacts, Tasks, Sheets, and Docs. That is why I selected it.
First we need to create OAuth credentials:
- Go to Google Cloud Console
- Navigate to APIs & Services → Credentials
- ‘Go to APIs overview’
- Click Create Credentials & OAuth client ID
- Select Desktop app as the application type
- Go to OAuth consent screenScroll then Audience and add your email address as test user
- Download the JSON credentials file (e.g., client_secret_....json)
Now we just need to use gog to authenticate the credentials, the difficult part is running it inside the container. Since it is a bash command, we must do as follows:
1docker compose run --rm \
2  -v "/PATH/TO/GOOGLE/FOLDER:/secrets:ro" \
3  --entrypoint sh \
4  openclaw-cli \
5  -lc "gog auth credentials /secrets/google-oauth.json"

--rmAutomatically removes the container after it exits-v "/PATH/TO/GOOGLE/FOLDER:/secrets:ro"Mounts a volume (bind mount) from your host into the container, ro: Read-only mode (container cannot modify files)--entrypoint shAllows you to run shell commands manually-lc "gog auth credentials /secrets/google-oauth.json".lstarts a login shell andcexecutes the following command string
the final command run in the container is
1gog auth credentials /secrets/google-oauth.json
then run the following command to add your email address using the same approach
1docker compose run --rm \
2  --entrypoint sh \
3  openclaw-cli \
4  -lc "gog auth add XXXXX@gmail.com --manual"
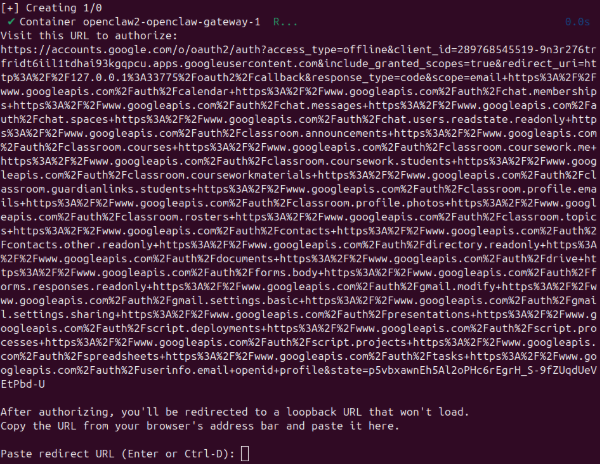
copy the link into the internet browser and click continue until you can configure the access to google
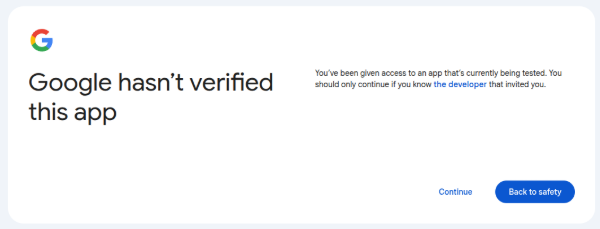
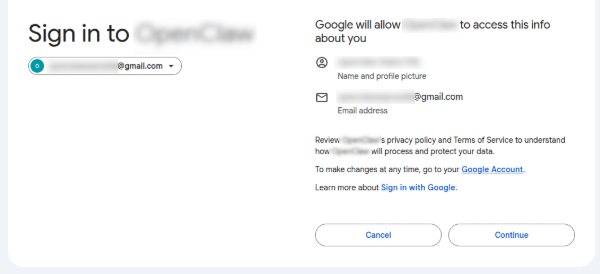
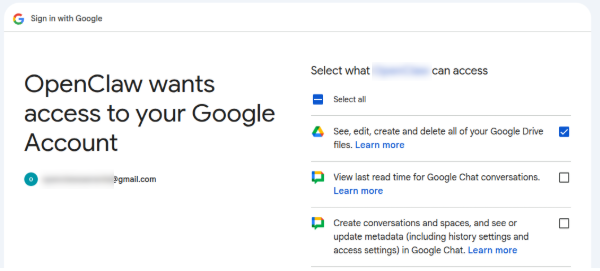
Returns a long url with an error of cannot open 127.0.0.1. Paste it back into the terminal
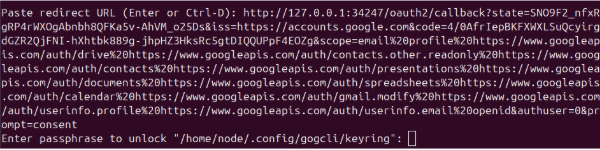
take good note of the passphrase or you will not be able to access gmail from openclaw (without doing everything again)

Now test the access with gog command
1docker compose run --rm \
2  --entrypoint sh \
3  openclaw-cli \
4  -lc "gog auth list"
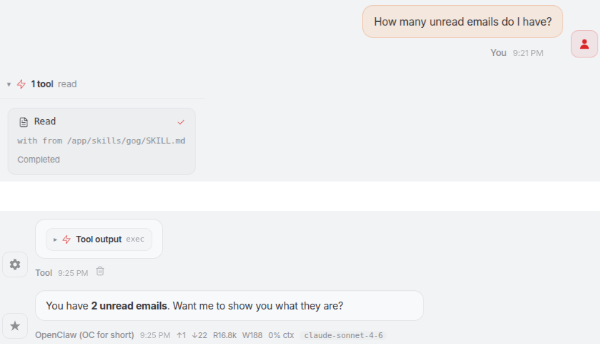
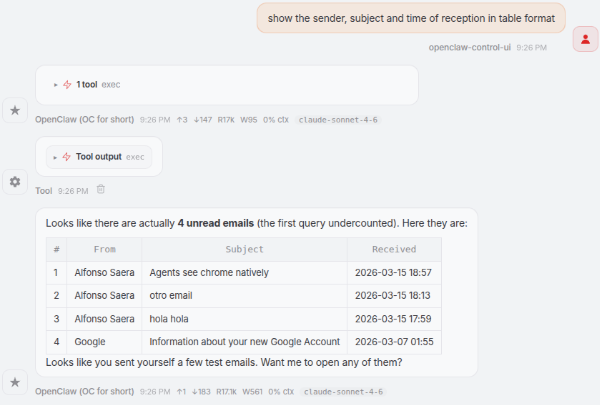
or from the chat in openclaw (or telegram!)
Final configurations
If you used the default docker configuration wizard, your secrets and API keys will be hardcoded in your openclaw.json file, and that it is not a good practice. We will use env var substitution for secrets as recommended in the configuration guidelines.
We start making a copy of the openclaw.json file, just in case:
1cp ~/.openclaw/openclaw.json ~/.openclaw/openclaw.json.bak.$(date +%F-%H%M%S)
next add new env vars to the .env file in the repo folder. Keep existing variables, and add the secrets currently living in openclaw.json.
1GOG_KEYRING_PASSWORD=XXXXXXX
2GOG_ACCOUNT=XXXXXXX@gmail.com
3
4OPENCLAW_BRAVE_API_KEY=XXXXXXX
5OPENCLAW_TELEGRAM_BOT_TOKEN=XXXXXXX
Only uppercase env var names are substituted (
[A-Z_][A-Z0-9_]*).
Missing or empty values typically fail at load time (good: fail fast).
To output a literal${VAR}string, escape like$${VAR}.
now we can edit openclaw.json to replace hardcoded secret values with placeholders
1...
2 "tools": {
3 "profile": "coding",
4 "web": {
5 "search": {
6 "enabled": true,
7 "provider": "brave",
8 "apiKey": "${OPENCLAW_BRAVE_API_KEY}"
9 }
10 }
11...
12 "channels": {
13 "telegram": {
14 "enabled": true,
15 "dmPolicy": "pairing",
16 "botToken": "${OPENCLAW_TELEGRAM_BOT_TOKEN}",
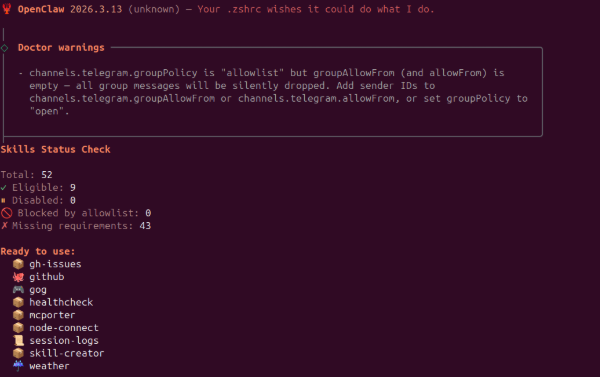
17 "groupPolicy": "allowlist",
18 "streaming": "partial"
19 }
20...
21 "auth": {
22 "mode": "token",
23 "token": "${OPENCLAW_GATEWAY_TOKEN}"
24 },
25...
once the files are modified is the turn of updating docker-compose.override.yml like this
 1services:
 2 openclaw-gateway:
 3   image: openclaw-with-skills
 4   volumes:
 5     - openclaw_home:/home/node
 6   environment:
 7     - GOG_KEYRING_PASSWORD=${GOG_KEYRING_PASSWORD:-}
 8     - GOG_ACCOUNT=${GOG_ACCOUNT:-}
 9     - OPENCLAW_BRAVE_API_KEY=${OPENCLAW_BRAVE_API_KEY:-}
10     - OPENCLAW_TELEGRAM_BOT_TOKEN=${OPENCLAW_TELEGRAM_BOT_TOKEN:-}
11
12
13 openclaw-cli:
14   image: openclaw-with-skills
15   volumes:
16     - openclaw_home:/home/node
17   environment:
18     - GOG_KEYRING_PASSWORD=${GOG_KEYRING_PASSWORD:-}
19     - GOG_ACCOUNT=${GOG_ACCOUNT:-}
20     - OPENCLAW_BRAVE_API_KEY=${OPENCLAW_BRAVE_API_KEY:-}
21     - OPENCLAW_TELEGRAM_BOT_TOKEN=${OPENCLAW_TELEGRAM_BOT_TOKEN:-}
22
23
24volumes:
25 openclaw_home:
To generate a new Gateway Auth Token run the following Python code
import secrets
print(secrets.token_hex(32))
Before restarting, you can check everything works as expected with
1docker compose config --environment
and now restart as before
1docker compose down
2docker compose up -d
The Core Files Behind OpenClaw
At the heart of OpenClaw is a set of simple, human-readable files that define how the AI behaves, remembers, and interacts with both you and the outside world. Rather than hiding its logic inside complex code, OpenClaw organizes its “thinking” into clearly named documents—each responsible for a different aspect of the assistant’s personality, memory, and capabilities. Together, these files act like the blueprint of the agent, making it easier to understand, customize, and trust how it works.
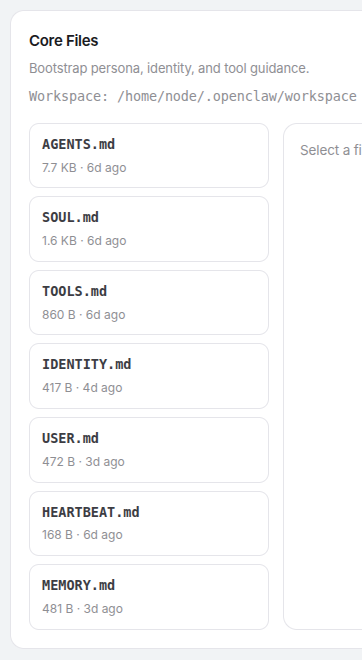
- AGENTS.md: Defines how the AI “agent” behaves: its role, responsibilities, and the rules it follows when taking actions on your behalf.
- HEARTBEAT.md: Keeps the system “alive” and responsive by tracking activity, timing, and whether the agent is running smoothly.
- IDENTITY.md: Describes who the AI is. its personality, tone, and core characteristics—so it behaves consistently across interactions.
- MEMORY.md: Stores important information the agent learns over time, allowing it to remember preferences, context, and past interactions.
- SOUL.md: Captures the deeper guiding principles or values of the agent, shaping how it makes decisions beyond simple instructions.
- TOOLS.md: Lists the external tools and capabilities the agent can use, such as sending messages, accessing apps, or performing tasks.
- USER.md: Contains information about you, the user—your preferences, habits, and context—so the agent can personalize its behavior.
- BOOTSTRAP.md: Defines how the agent gets started, including its initial setup, default state, and the steps it follows when it first comes online. It ensures the system begins in a consistent and ready-to-use condition and deletes itself once its job is done.
Take away
- Use
docker compose up -danddocker compose downto start and stop your OpenClaw - Remember to set up
openclaw_homeso changes are persistent across restarts and recreations - Use custom
Dockerfile.skillsanddocker-compose.override.ymlfiles to install skills and other software - Use
.envfile and var substitution to avoid hard coding secrets - If you know what you are doing skip wizard and use OpenClaw config generator